
Seal Out the Cavities: Why Dental Sealants are the “Secret Armor” for Kids
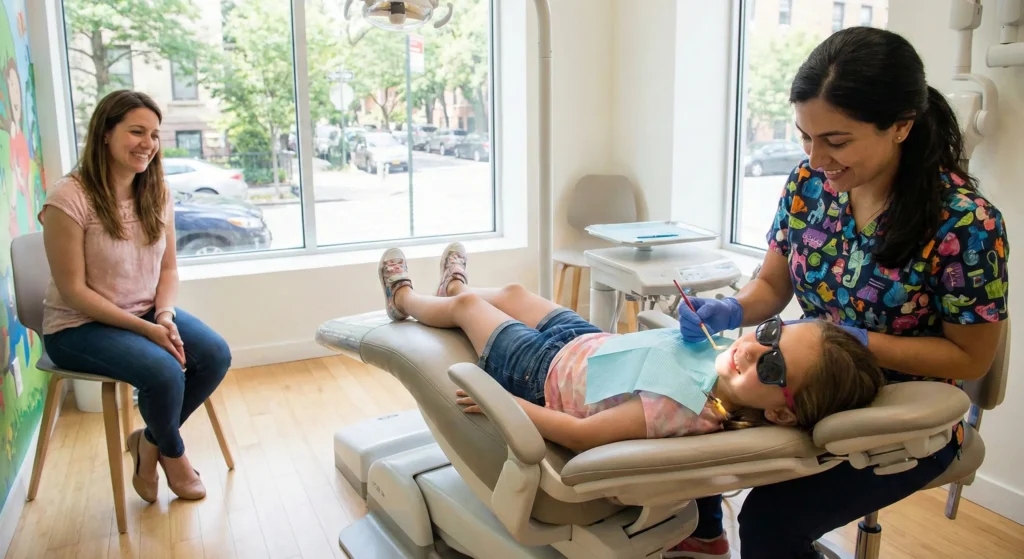
Blog Seal Out the Cavities: Why Dental Sealants are the “Secret Armor” for Kids How Sealants Protect Kids’ Molars from Cavities in Brooklyn This article provides evidence-based information on dental sealants and their role in preventive pediatric dentistry. It reflects current guidance from major dental organizations regarding cavity prevention, material safety, and recommended timing for sealant placement. What are dental sealants? Dental sealants are thin protective coatings applied to the chewing surfaces of molars to prevent cavities. They work by sealing the deep grooves (pits and fissures) where food and bacteria get trapped, creating a smooth barrier that’s easier to keep clean. The painless dental procedure takes just minutes per tooth, and research shows sealants can significantly reduce cavity risk in back teeth especially during the first few years after placement.. What Are Dental Sealants? The ‘Secret Armor’ That Protects Kids’ Molars in Brooklyn As a Brooklyn parent, you do everything you can to protect your child’s health from nutritious meals to regular checkups. But even with careful brushing and limited sweets, many children still develop cavities in their back teeth. The reason is the deep grooves and pits on the chewing surfaces of molars tiny crevices where toothbrush bristles often can’t reach. That’s where dental sealants come in. A simple, painless preventive treatment that creates a protective shield against cavity-causing bacteria. Why Back Teeth Are Cavity Magnets Children’s permanent molars have deep pits and fissures on their chewing surfaces natural grooves that help grind food. Unfortunately, these same grooves are perfect hiding spots for food particles and bacteria. Even with diligent brushing, toothbrush bristles are often too wide to clean deep into these tiny crevices. When food and bacteria remain trapped in these grooves, they produce acid that attacks tooth enamel. Over time, this can lead to cavities often before parents even realize there’s a problem. In fact, according to the Centers for Disease Control and Prevention (CDC), molars and premolars are the most common sites for cavities in children. This is why protecting molars from cavities requires more than just brushing and flossing. How Sealants Work Think of sealants as a raincoat for your child’s teeth. Just as a raincoat prevents water from soaking through clothing, sealants prevent food particles and bacteria from settling into the deep grooves of molars. This protective coating: Creates a smooth surface that’s easier to clean Blocks food and bacteria from reaching the enamel in deep grooves Makes tooth surfaces more resistant to acid attacks Allows fluoride from toothpaste to better protect the tooth What Sealants Do and Don’t Do What they do: Sealants help reduce the risk of cavities on the chewing surfaces of back teeth where they’re applied. What they don’t do: Sealants are not a replacement for good oral hygiene. Your child still needs to brush twice daily with fluoride toothpaste, floss, limit sugary snacks, and visit the dentist . Sealants also don’t protect the sides of teeth between molars – that’s where flossing comes in. Materials Used Most dental sealants are made from resin-based materials that have been safely used in dentistry for decades. In some cases, dentists may use glass ionomer sealants, especially when moisture control is difficult or when sealing certain baby teeth. Why Preventive Dentistry for Kids Matters Dental sealants are one part of a comprehensive preventive dentistry strategy for children. When combined with other protective measures, they create multiple layers of protection against cavities: Fluoride (from toothpaste, water, and professional treatments) strengthens enamel Brushing and flossing remove plaque and food particles Healthy diet limits sugar exposure that feeds cavity-causing bacteria Regular dental exams catch problems early Dental sealants add a physical barrier to vulnerable tooth surfaces According to the American Dental Association (ADA), the combination of fluoride and sealants provides the best cavity prevention for children. Protecting Molars from Cavities: Understanding Pits and Fissures To understand why sealants are so effective, it helps to know a bit about tooth anatomy. The chewing surfaces of molars aren’t flat they have grooves, pits, and fissures that vary in depth from child to child. Why These Grooves Cause Problems They’re narrow and deep They trap food and bacteria They create an ideal environment for decay Some children have deeper pits and fissures than others, putting them at higher risk for cavities even with excellent oral hygiene. Sealants level the playing field by filling in these grooves and creating a smooth, cleanable surface. Who Should Get Sealants and When? The best time for dental sealants is soon after permanent molars erupt and before cavities have a chance to develop. Timing for Sealants First permanent molars: Usually erupt around age 6 (though timing varies by child) Second permanent molars: Typically erupt around age 12 Premolars: May also benefit from sealants if they have deep grooves (usually ages 10-12) Children at Higher Risk While all children can benefit from sealants, they’re particularly important for children who: Have had cavities in their baby teeth or other permanent teeth Have deep pits and fissures in their molars Snack frequently or consume sugary drinks Have limited exposure to fluoridated water Have difficulty with thorough brushing (due to age, motor skills, or orthodontic appliances) Have special healthcare needs that make dental care challenging A Painless Dental Procedure: What Happens During Sealant Application One of the best things about dental sealants is how quick and comfortable the procedure is. Step-by-Step Process The dental hygienist or dentist thoroughly cleans the tooth surface to remove any plaque or food particles The tooth is dried completely, often with cotton or a small suction device A mild conditioning gel is placed briefly to help the sealant bond securely. The liquid sealant is carefully painted into the grooves and pits of the tooth The dentist checks that the sealant doesn’t interfere with your child’s bite and makes any needed adjustments How Long Does It Take? The entire process typically takes just a few minutes per tooth. For a child getting sealants on all four permanent molars, the appointment often
Are Dental X-Rays Safe for Children? Modern Tech vs. Old Myths
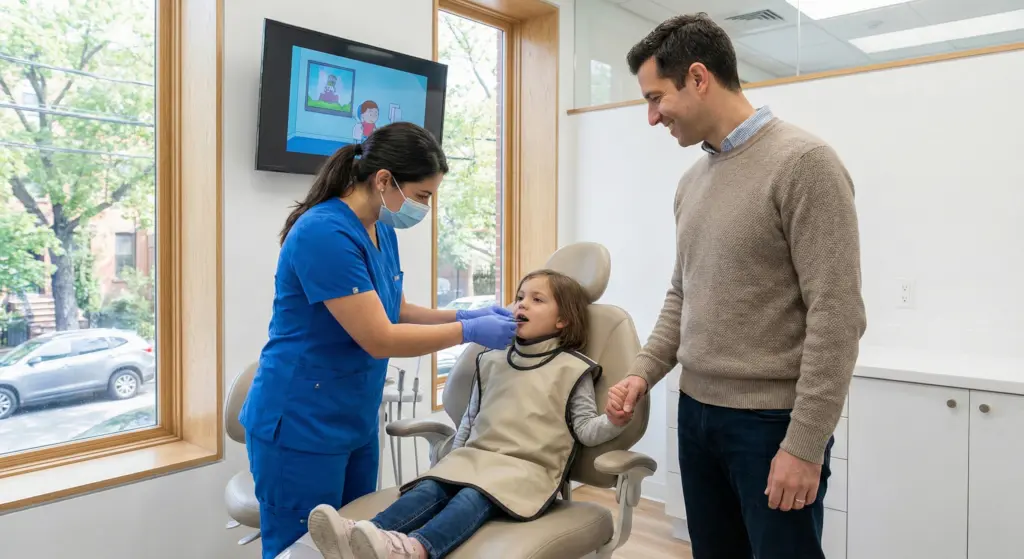
Blog Are Dental X-Rays Safe for Children? Modern Tech vs. Old Myths Modern Digital Imaging, Radiation Facts, and What Brooklyn Parents Should Know This article provides evidence-based guidance on pediatric dental imaging and radiation safety. It reflects current professional recommendations regarding digital dental X-rays, ALARA principles, and child-specific imaging protocols. Are dental X-rays safe for children? Yes, modern dental X-rays are very safe for children when used appropriately. Digital dental X-rays use extremely low radiation doses,often comparable to natural background radiation we encounter daily. Dentists follow the ALARA principle (as low as reasonably achievable) and only recommend X-rays when diagnostic benefits outweigh minimal exposure. Exact exposure varies by the type of X-ray (bitewing vs panoramic), your child’s size, and the equipment used. Are Dental X-Rays Safe for Children? Modern Tech vs. Old Myths As a Brooklyn parent, you want the best for your child’s health. When the dentist recommends X-rays, you might think, are dental X-rays safe for children? How much radiation is involved? Is it really necessary? These questions are completely valid. Modern dental imaging has advanced dramatically. Digital dental X-rays for kids use a fraction of the radiation older systems required, and pediatric dentists only recommend them when truly needed to detect problems invisible to the eye. Why Kids Need Dental X-Rays Dental X-rays provide critical diagnostic information that visual exams alone cannot reveal, especially in growing children whose teeth and jaws constantly change. Detecting Hidden Cavities Cavities between teeth called interproximal cavities are common in children but completely invisible during visual exams because teeth touch too closely. X-rays reveal decay in these hidden spaces. Monitoring Development and Eruption X-rays show how permanent teeth develop beneath gums, whether teeth erupt properly, if adequate space exists for incoming teeth, and whether any teeth are missing, extra, or impacted. Assessing Infections and Trauma Dental infections can spread to bone around tooth roots without surface symptoms. After injuries, X-rays reveal damage to tooth roots, jawbones, or developing permanent teeth beneath gums. Orthodontic Planning Before braces or orthodontic care, dentists use diagnostic dental imaging to assess jaw growth, tooth position, root development, and impacted teeth. Modern Digital X-Rays vs. Older Film X-Rays If you remember dental X-rays from the 1980s or 1990s, today’s technology is different and far safer. Digital Sensors vs. Film Modern digital dental X-rays use electronic sensors. These sensors are far more sensitive, requiring significantly less radiation to capture high-quality images. Exposure times are much shorter often fractions of a second.Digital dental X-rays generally use significantly less radiation than older film X-rays, though the exact reduction depends on the equipment and settings. Instant Results and Better Quality Digital images appear on screens within seconds, eliminating re-takes due to processing errors and reducing unnecessary exposure. Dentists can enhance images, zoom on specific areas, and share easily for consultations. Focused Beams and Collimation Modern equipment uses collimation focusing X-ray beams only on specific areas being imaged. This prevents unnecessary exposure to surrounding tissues and further reduces overall doses. How Dentists Keep Radiation Low: The ALARA Principle Pediatric dentists follow ALARA: ‘As Low As Reasonably Achievable.’ This means using the lowest radiation dose while obtaining needed diagnostic information. Risk-Based Imaging Decisions X-rays aren’t automatic. Dentists consider: Age and developmental stage Cavity risk (diet, hygiene, previous decay, fluoride exposure) Symptoms (pain, swelling, trauma) What visual exams cannot reveal Time since last X-rays Child-Specific Settings Machines adjust for children’s smaller bodies, using lower exposure settings, fast exposure times, and precise positioning to capture needed areas without unnecessary exposure. Trained Staff Professionals receive specialized training in radiation safety, positioning techniques, and equipment operation. Proper positioning on the first try avoids retakes and minimizes total exposure. Do Kids Need Lead Aprons or Thyroid Collars? This common question has evolved with modern technology and updated professional guidance. Updated Guidance on Shielding With modern, collimated digital dental X-rays, routine patient shielding (lead aprons and thyroid collars) is not always necessary. Current recommendations emphasize minimizing exposure by optimizing technique using tight collimation, correct positioning, and child-specific settings while following the ALARA principle and taking X-rays only when clinically needed. That said, practices vary some offices still use shielding for comfort or because of local/state rules. If you prefer a thyroid collar, ask your dentist what they use and why. How Often Should Children Get Dental X-Rays? Frequency depends on individual needs, risk factors, and dental health status. General Guidelines Low cavity risk: Bitewing X-rays every 12-24 months Moderate to high risk: X-rays every 6-12 months to monitor decay New patients: Baseline X-rays unless recent ones are available Panoramic X-rays: as clinically indicated Common Myths vs. Evidence-Based Facts Myth Evidence-Based Fact Dental X-rays aren’t safe for children. Modern dental X-rays use very low radiation. Dentists recommend them only when diagnostic benefits outweigh minimal exposure. Without lead aprons, it’s unsafe. Modern equipment with proper technique is safe with or without routine shielding. Many offices still use aprons, which is also fine. X-rays are just for cavities. X-rays assess development, eruption, infections, trauma, and orthodontic needs—issues not visible during visual exams. What Happens During a Child’s Dental X-Ray Understanding the process eases anxiety: Positioning: The assistant helps your child sit comfortably and positions a small sensor in their mouth Quick exposure: The machine is positioned and the X-ray taken in a fraction of a second, just a click Protection: Depending on practice, a lead apron may be used Review: Images appear on screen immediately; retakes are rare with trained staff Pediatric teams use gentle language, demonstrate on parents, offer praise, and work quickly. If your child is anxious, let the team know ahead of time. Frequently Asked Questions Are dental X-rays safe for toddlers? Yes, when used appropriately. Pediatric dentists use child-specific settings with extremely low radiation doses. Why can't dentists see cavities without X-rays? Visual exams detect surface cavities but cannot see between teeth where they touch. Decay also occurs beneath surfaces or fillings. How often do kids need dental X-rays? It depends on cavity risk. Low-risk children may
Baby’s First Dental Visit: A Brooklyn Parent’s Timeline & Guide

Blog Baby’s First Dental Visit: A Brooklyn Parent’s Timeline & Guide A Brooklyn Parent’s Guide to Early Dental Care and Healthy Habits This article is written to guide parents through their child’s earliest dental milestones using evidence-based pediatric dental recommendations. It focuses on prevention, education, and helping families build healthy oral habits from infancy. When should my baby have their first dental visit? It is best to schedule your baby’s first dental visit by age 1, or within 6 months after the first tooth appears whichever comes first. This early visit helps establish a dental home, allows the dentist to check for early signs of decay, and gives parents guidance on infant oral health, teething, feeding habits, and proper brushing techniques. Why Your Baby’s First Dental Visit Matters As a new parent in Brooklyn, you’re juggling pediatrician appointments, feeding schedules, sleep training, and countless other milestones. It’s common to wonder whether babies really need a dentist yet. The answer is yes ,and the first visit is mostly about prevention, education, and guidance. Your baby’s first dental visit isn’t about drilling or filling cavities. It’s about prevention, education, and establishing a relationship with a pediatric dentist who can guide you through teething, brushing, and keeping those tiny teeth healthy as they grow. Early childhood cavities can develop early, but with the right routine and guidance, they’re often preventable. When Should a Baby Go to the Dentist? The American Academy of Pediatric Dentistry recommends a child’s first dental visit by age 1, or within 6 months of the first tooth erupting, whichever comes first. This recommendation is based on decades of research showing that early dental visits improve long-term oral health outcomes and help prevent early childhood cavities. Why so early? Prevention starts before problems appear Parents get personalized guidance Establishing a continuity of dental care Catching issues early since some babies are at higher risk for cavities due to diet, genetics, or feeding habits Even if your baby doesn’t have teeth yet by age 1, the visit is still valuable. The dentist can examine gum health, check jaw and facial development, and provide guidance on oral hygiene practices to start as soon as teeth begin erupting. Brooklyn Parent Timeline: From Birth to Toddlerhood 0-3 Months: Gum Care Begins Even before teeth appear, you can start building healthy habits. After feedings, gently wipe your baby’s gums with a clean, damp cloth or soft gauze. 3-6 Months: Teething May Begin Many babies start teething between 4 and 7 months, though the timing varies widely. You might notice increased drooling, fussiness, or a desire to chew on everything. Safe soothing options include chilled (not frozen) teething rings, gentle gum massage with a clean finger, or a cool, damp washcloth for baby to chew on. 6-12 Months: First Tooth Dental Care Most babies get their first tooth between 6 and 10 months. Once that first tooth appears, it’s time to start brushing. How to brush: Use a soft-bristled, small-headed baby toothbrush Apply a tiny smear of fluoride toothpaste Brush gently twice a day, especially before bedtime No need to rinse at this age, the small amount of toothpaste is safe to swallow By 12 Months: Schedule the First Dental Visit Whether your baby has one tooth or several, aim to have that first dental appointment by their first birthday. The dentist will conduct a gentle examination, answer your questions, and provide personalized guidance for the months ahead. 12-24 Months: Building Healthy Habits During the toddler months, continue brushing twice daily with a rice-grain-sized smear of fluoride toothpaste. And also your dentist will guide you on: Transitioning from bottle to cup Managing snacking and sugary drink habits Fluoride needs based on your local water supply and cavity risk When to start flossing (usually when teeth touch) Follow-up visit frequency What Happens at the First Dental Visit? Many parents worry about what to expect at their baby’s first dental appointment. The Examination The dentist or hygienist will examine your baby’s mouth, by checking, Gum health and any erupting teeth Tooth development and alignment Signs of early decay (white or brown spots) Jaw and facial growth Bite issues or concerns Parent Education and Guidance The first visit is as much about coaching parents as it is about examining the baby. The dentist will discuss, Proper brushing technique and frequency Fluoride toothpaste use and dosage Feeding practices that affect dental health Pacifier use or thumb-sucking habits Teething and how to soothe discomfort safely Warning signs that require a follow-up visit How to Prepare Your Baby (and Yourself) for the Visit A little preparation can make the first dental visit smoother for everyone, Pick the Right Time Schedule the appointment when your baby is typically well-rested and fed. Avoid nap times or times when they’re usually hungry or cranky. What to Bring Insurance card and ID List of any medications or supplements your baby takes Notes on feeding routine and any concerns Your questions about teething, brushing, pacifiers, or thumb-sucking Comfort items Stay Calm and Positive Babies pick up on parental anxiety. Even if you’re nervous about the dentist yourself, try to stay relaxed and upbeat. Use a cheerful tone when talking about the visit. First Tooth Dental Care: Daily Routine That Prevents Cavities Establishing a consistent oral care routine from the moment the first tooth appears is one of the best things you can do for your child’s long-term dental health. Brush Twice Daily Once teeth erupt, brush them twice a day, ideally in the morning and before bed. Use a soft-bristled toothbrush designed for babies and a tiny smear of fluoride toothpaste (about the size of a grain of rice for children under 3). Avoid Sharing Utensils Cavity causing bacteria can be transmitted from parent to child through saliva. While it’s not always possible to avoid, try not to share spoons, cups, or clean pacifiers with your mouth. Fluoride and Water If your home has fluoridated tap water ,your baby gets some fluoride from drinking water
Weekend Toothache? When to Call an Emergency Dentist in Brooklyn

Blog Weekend Toothache? When to Call an Emergency Dentist in Brooklyn How to Tell If Weekend Tooth Pain Needs Same-Day Dental Care This article was written to help Brooklyn residents make safe, time-sensitive decisions when weekend tooth pain strikes. It reflects current clinical guidance on dental emergencies, first-aid care, and when same-day treatment is necessary. When Weekend Tooth Pain Becomes a Dental Emergency It’s Friday night, and your tooth starts throbbing. By Saturday morning, the pain is worse, and you’re wondering: do I need to see a dentist right now, or can this wait until Monday? When you’re dealing with a persistent toothache emergency during the weekend, knowing when to seek immediate care can make the difference between saving a tooth and facing more extensive treatment later. Not all tooth pain requires emergency care, but certain symptoms shouldn’t wait. This guide will help Brooklyn residents quickly determine whether their weekend toothache needs same-day attention, what safe steps they can take at home, and when to head to an emergency dentist versus the ER(Emergency Room). What Counts as a Persistent Toothache Emergency? A persistent toothache can become an emergency when it’s severe, worsening, wakes you up at night, lasts more than a few hours, or comes with swelling, fever, or drainage. Warning signs that your toothache may be an emergency: Swelling in your jaw, face, or gums Fever accompanying tooth pain Bad taste or drainage from the tooth Radiating pain spreading to the ear, neck, or jaw joint Sharp pain when biting or chewing Severe, throbbing pain that keeps you awake Recent dental trauma or injury Dental pain can result from nerve inflammation (pulpitis) inside the tooth or from infection in the surrounding bone and tissue. Both conditions often require professional treatment to prevent complications and relieve pain. Toothache vs Emergency: Quick Weekend Triage When tooth pain strikes on the weekend, use this simple guide to decide your next step: Go to the ER(Emergency room) or Call 911 (U.S. emergency services) Immediately If: You have trouble breathing or swallowing Facial or neck swelling is rapidly spreading You have high fever with facial swelling You experienced major facial trauma Bleeding is uncontrolled despite 20 minutes of pressure Call a Weekend Dentist in Brooklyn Same Day If: Severe toothache with visible swelling or suspected abscess Radiating jaw pain that’s getting worse Cracked or broken tooth with sharp pain when biting Tooth knocked out or partially dislodged Broken tooth with exposed inner structure Pain from a recent dental procedure that’s worsening Can Usually Wait Until Monday (But Call for Guidance): Lost filling or crown with mild sensitivity but no severe pain Small chip with no pain or sharp edges Dull, intermittent toothache that’s manageable with OTC pain medication Mild temperature sensitivity that comes and goes Understanding the difference between emergency room care and emergency dental care can help you get the right treatment faster. The ER focuses on airway management, medical stabilization, and infection control through medications when indicated. They may provide pain relief and prescribe antibiotics when clinically indicated, but for definitive dental treatment (like draining an abscess, removing a damaged tooth, or starting an emergency root canal), you need a dentist. Common Reasons Tooth Pain Spikes on Weekends Why does tooth pain always seem to get worse on Saturday night? The truth is, it doesn’t necessarily spike on weekends but when you’re busy during the week, you might not notice mild symptoms until you slow down. Pulpitis (Inflamed Tooth Nerve) Pulpitis occurs when the nerve inside your tooth becomes inflamed, often due to deep decay, a crack, or repeated dental work. Symptoms include lingering pain after hot or cold foods, spontaneous throbbing, and intense pain that wakes you at night. Cracked Tooth A cracked tooth can cause sharp pain when biting or chewing, especially when you release the pressure. Cracks can be hard to detect visually, but a dentist can identify them through examination and X-rays. Lost Filling or Crown When a filling or crown comes out, the inner layers of your tooth (dentin) become exposed. The exposed area is also vulnerable to bacteria and further decay. Dental Abscess A dental abscess is a pocket of pus caused by bacterial infection, usually at the root of a tooth or in the gums. Symptoms include persistent, throbbing pain, swelling in the jaw or face, tenderness when touching the area, bad taste in your mouth, and sometimes fever. Wisdom Tooth or Gum Inflammation Pain and swelling behind your back molars can indicate an erupting wisdom tooth or inflammation of the gum tissue around it (pericoronitis). This can cause soreness, swelling, difficulty opening your mouth, and sometimes a bad taste. Safe Dental Pain Relief at Home (Until You’re Seen) While arranging professional care, these safe steps can help manage tooth pain: Safe Home Care Steps Mix 1/2 teaspoon of salt in 8 ounces of warm water and rinse gently several times a day Remove any trapped food particles that might be causing irritation Apply a cold compress to the outside of your cheek for 15–20 minutes to reduce swelling. Take OTC pain medication as directed Elevate your head when sleeping What NOT to Do Don’t place aspirin directly on your gums or tooth Avoid alcohol-based mouthwashes on open sores Never use a heating pad on facial swelling, it can worsen inflammation. Don’t try to puncture or drain a swollen area Don’t take leftover antibiotics from a previous prescription But remember these home care measures are temporary. They’re not substitutes for professional treatment, especially if you’re experiencing severe symptoms. When You Might Need a Root Canal Emergency Many weekend toothaches that require same-day care turn out to need root canal therapy. If you’re experiencing severe, persistent pain with or without swelling, it may indicate that the nerve inside your tooth is inflamed or infected. An emergency root canal aims to relieve pain and address infection by removing the damaged nerve tissue and cleaning the inside of the tooth. Sometimes the first emergency visit involves
Brooklyn Emergency Guide: What Actually Counts as a Dental

Blog Dental Emergency Guide Brooklyn: What Counts as an Emergency When to Call an Emergency Dentist, Go to the ER, or Safely Wait This article was written to help Brooklyn residents make clear, time-sensitive decisions during dental emergencies. It reflects current clinical guidance on urgent dental care, first aid, and when hospital-level treatment is necessary. Introduction-What counts as a dental emergency? A dental emergency includes severe pain, uncontrolled bleeding, dental trauma, knocked-out teeth, or signs of infection like facial swelling or an abscessed tooth. These situations often require immediate dental care. If you experience trouble breathing or swallowing, rapidly spreading facial swelling, fever with facial swelling, or severe trauma, go to the ER (Emergency Room) or call 911(U.S. emergency services) immediately. For a knocked-out adult tooth, severe toothaches, or visible abscesses, contact an emergency dentist in Brooklyn NY as soon as possible. Brooklyn Emergency Guide: What Actually Counts as a Dental Emergency? It’s 2 AM, and your tooth is throbbing. Or maybe your child just knocked out a tooth at the playground. You’re searching on your phone, trying to figure out: do I need care right now, or can this wait until morning? Dental emergencies can be stressful and painful, but knowing what counts as a true emergency and where to go for help can make all the difference in saving a tooth, managing pain, and preventing complications. What Actually Counts as a Dental Emergency? A dental emergency is any situation involving your teeth, gums, or mouth that requires immediate attention to relieve severe pain, stop bleeding, save a tooth, or prevent a serious infection from spreading. These situations can’t safely wait days or weeks for a regular appointment. Common dental emergencies include: Knocked-out tooth (avulsed tooth) Severe, persistent toothache Broken or cracked tooth with pain or sharp edges Dental abscess or swollen jaw (signs of infection) Uncontrolled bleeding from the mouth Partially dislodged tooth (tooth pushed out of position) Dental trauma from an accident or injury Persistent bleeding after a tooth extraction If you’re experiencing any of these issues, time often matters. The sooner you get appropriate care, the better your chances of preserving your tooth and preventing complications. ER vs Emergency Dentist vs Can Wait: Quick Decision Guide Not all dental problems require the same level of urgency. Here’s how to decide where to go: Go to the ER or Call 911 Immediately If: Some dental problems can become life-threatening medical emergencies. Seek emergency medical care right away if you experience: Difficulty breathing or swallowing Facial swelling accompanied by fever Rapidly spreading swelling of the face or neck Severe facial trauma or suspected broken jaw Uncontrolled bleeding that won’t stop after 15-20 minutes of pressure These situations require hospital-level care. The ER can stabilize you, address life-threatening complications, and refer you to a dentist for follow-up dental treatment once the emergency is under control. Call an Emergency Dentist Brooklyn, NY Same Day If: Many dental emergencies are best handled by a dentist rather than an ER. Knocked-Out Adult Tooth If the tooth is kept moist and you get to a dentist within 30-60 minutes, it may be possible to reimplant it successfully. Severe Toothache or Tooth Pain Persistent, intense tooth pain that doesn’t respond to over-the-counter pain relief may indicate infection, deep decay, or an abscess. Ignoring it can lead to worsening infection and more extensive treatment. Dental Abscess or Swollen Jaw A visible bump on your gums, swelling along the jaw, or a pimple-like sore on the gums can be a sign of a dental abscess Broken or Cracked Tooth with Pain A broken tooth emergency occurs when a tooth fractures and exposes inner tooth structure or causes significant pain or sensitivity. Tooth Partially Dislodged or Pushed Out of Position A tooth that’s been shifted from trauma needs to be repositioned and stabilized as soon as possible to prevent permanent damage or loss. Persistent Bleeding After Tooth Extraction Some bleeding after an extraction is normal, but if it continues heavily for several hours despite biting on gauze, you should contact your dentist or an emergency dentist for evaluation. Can usually wait 24-72 Hours (but you still need a dental appointment) Not every dental problem requires same-day care. Small chip or crack without pain Lost filling or crown without pain Mild tooth sensitivity Dull toothache that comes and goes Even if these issues don’t require emergency care, it’s still wise to call your dentist for guidance What to Do Right Now: Safe First Aid for Dental Emergencies For Tooth Pain Relief Rinse your mouth with warm salt water Gently floss around the painful tooth to remove any trapped food Take OTC pain relievers if safe for you and as directed on the label (ibuprofen or acetaminophen) Apply a cold compress to the outside of your cheek for 15-20 minutes to reduce swelling Do NOT place aspirin directly on the tooth or gums For a Knocked-Out Permanent (Adult) Tooth Handle the tooth by the crown only (avoid touching the root) Rinse it gently with water if dirty (do not scrub or use soap) If possible, try to place the tooth back in the socket immediately Important: Do not try to reinsert a baby tooth. Replanting guidance applies to an adult (permanent) tooth. If you’re unsure, keep the tooth moist and contact a dentist immediately. If you can’t reinsert it, keep it in milk (best at home) or in a clean container with saliva, or a tooth preservation kit(not water) Get to a dentist within 30-60 minutes for the best chance of saving the tooth For a Broken or Cracked Tooth Rinse your mouth with warm water Save any tooth fragments you can find If there’s bleeding, apply gauze for 10 minutes Use a cold compress on the outside of your mouth to reduce swelling Cover any sharp edges with dental wax or sugar-free gum temporarily to protect your tongue and cheeks For Swelling or Abscess Rinse with warm salt water several times a day Apply a
Investing in Perfection: How Long Do Veneers Last & How to Protect Them?
Blog Investing in Perfection: How Long Do Veneers Last & How to Protect Them? Veneer Lifespan, Care Habits, and How to Protect Your Smile Investment Reviewed by Dr. Michael Shaffer, with clinical insight into veneer materials, longevity, and maintenance. This article is designed to help patients understand realistic expectations and long-term care considerations for dental veneers. How long do dental veneers last? Porcelain veneers typically last 10 -15 years with proper care, though some can last longer. Composite resin veneers usually have a shorter lifespan. Actual longevity varies by case and depends on factors like teeth grinding (bruxism), bite forces, oral hygiene habits, and gum recession. Regular dental checkups, avoiding hard foods, wearing a nightguard if you grind your teeth, and maintaining good oral hygiene can help maximize veneer lifespan. How Long Do Veneers Last & How to Protect Them You’ve invested in a beautiful smile. Whether you chose veneers to correct chips, close gaps, brighten discolored teeth, or reshape your smile entirely, you made a significant commitment to your appearance and confidence. Now comes the natural question: how long will they last? If you’re searching for dental veneers in Brooklyn or already have them and want to protect your investment, understanding realistic lifespan expectations and proper maintenance is important. The good news is that with the right care and habits, porcelain veneers can serve you well for many years. However, certain habits and risk factors can significantly shorten that lifespan. How Long Do Dental Veneers Actually Last Veneer lifespan depends heavily on the type of material used and how well you care for them. Here’s what research and clinical experience generally show. Porcelain Veneers: 10-15 Years (Often Longer with Excellent Care) Porcelain veneers are the most durable and stain-resistant option. Research and clinical experience commonly suggest a porcelain veneer lifespan of around 10–15 years, and many last longer with excellent care. In ideal cases, some porcelain veneers may last 20+ years, but results vary by person and habits. With conscientious care, porcelain veneers can be a long-term cosmetic solution. Composite Veneers: Shorter Lifespan, More Maintenance Composite resin veneers (sometimes called dental bonding when applied to repair or reshape teeth) typically have a shorter lifespan than porcelain. They are more prone to staining from coffee, tea, red wine, and certain foods, and they can chip more easily. Many composite veneers may need repair, refinishing, or replacement often around 5 –7 years (sometimes longer with meticulous care). With conscientious care, porcelain veneers can be a long-term cosmetic solution. What Actually Determines Veneer Lifespan? Longevity isn’t just about the material. Several clinical and lifestyle factors play a major role in how long veneers last. Material and Lab QualityPorcelain veneers are stronger and more stain-resistant than composite resin. High-quality dental labs that specialize in cosmetic work tend to produce veneers with better fit, color matching, and durability. Bonding Substrate: Enamel vs. DentinVeneers bond more predictably to enamel than to dentin. When bonded primarily to enamel, the bond tends to be stronger and longer lasting. Bite Forces and Bruxism (Teeth Grinding)Bruxism, is one of the biggest risk factors for veneer damage, so a nightguard is often recommended. Gum Recession and MarginsOver time, gums can naturally recede due to aging, aggressive brushing, gum disease, or genetics. Damaging HabitsUsing your teeth as tools – opening packages, biting nails, chewing on pens, or cracking ice puts unnecessary stress on veneers and can lead to chips or fractures. Veneer Maintenance Tips: How to Protect Caring for veneers isn’t complicated, but it does require consistent attention. 1. Daily and Weekly Care Brush twice daily with a soft-bristled toothbrush Use non-abrasive fluoride toothpaste Floss daily ,especially at the gum line and veneer margins. Rinse after meals when possible 2. Professional Care Schedule regular dental cleanings Ask your hygienist to check veneer margins during cleanings Have bite adjustments made if needed 3. If You Grind Your Teeth (Bruxism) Wear a custom night guard as recommended Clean the night guard regularly 4. For Sports and Physical Activities Wear a mouthguard during contact sports or high-impact activities Foods and Habits That Can Damage Veneers Veneers are durable, but they’re not immune to damage. Certain foods and habits put them at higher risk. Don’t use your teeth to, Open packages or bottles Bite your nails Chew on pens, pencils, or other objects Crack nuts or tear tags off clothing Hard foods can chip veneers. Be Careful with very hard foods Ice cubes (never chew ice) Hard candies and lollipops Popcorn kernels (especially unpopped kernels) Very hard crusty bread or pizza crust Bone-in meats where you might accidentally bite bone Watch Out for Sticky and Chewy Foods Sticky foods can pull at the edges of veneers and, in some cases, stress the bonding material. Taffy and caramel Gummy candies Chewy granola bars or energy bars This doesn’t mean you can never enjoy these foods, but moderation and mindfulness matter. Can Veneers Be Replaced? Veneer replacement is a normal possibility over time. Whether due to normal wear, chips, changes in gum margins, or simply wanting to update the aesthetics, veneers can be replaced. What Replacement Involves Evaluating the health of the underlying tooth and surrounding gum tissue Carefully removing the old veneer Planning and fabricating a new veneer Bonding the new restoration in place Why Patients Choose Replacement Chips, cracks, or visible wear after years of use Gum recession exposing the veneer margin or creating a dark line Staining or discoloration of the margins or adjacent natural teeth Desire to update the color, shape, or size for a refreshed look Replacement is a normal part of the lifecycle of cosmetic dental work. With advances in materials and techniques, replacement veneers often look even better than the originals. Signs Your Veneers May Need Repair or Replacement Visible Chips, Cracks, or Rough Edges Loose Veneer or Veneer That Fell Off Persistent Sensitivity or Pain Dark Line Near the Gumline or Visible Margins Bite Feels ‘Off’ or Discomfort When Chewing Protecting Your Veneers in
The Real Cost of a “NYC Smile”: Porcelain Veneers in Brooklyn
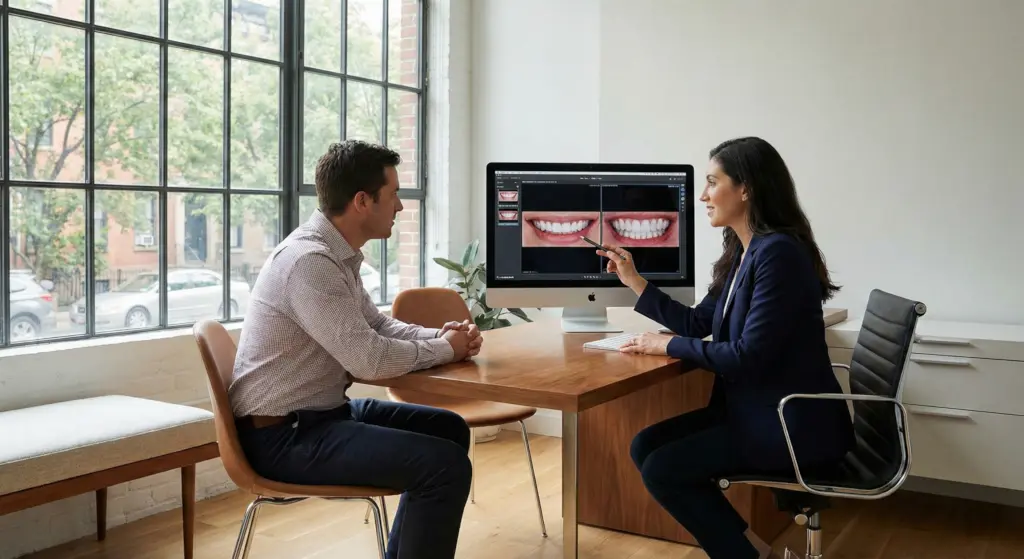
Blog The Real Cost of a “NYC Smile”: Porcelain Veneers in Brooklyn Brooklyn Pricing, Real Factors, and What Veneers Actually Cost in NYC Written by a dental content team with clinical review by Dr. Michael Shaffer, focusing on evidence-based cosmetic dentistry and patient decision-making. This article is intended to help readers understand costs, risks, and long-term value before pursuing porcelain veneers in NYC. An overview of How Much Do Porcelain Veneers Cost in NYC? Porcelain veneers in NYC often range about $2,000 to $5,000 (and higher in premium cases) per tooth, though prices vary based on the dentist’s expertise, lab quality, case complexity, and customization level. Most smile makeovers involve 6–10 veneers. Only a consultation with a Brooklyn cosmetic dentist can provide an accurate estimate for your specific case. Why Porcelain Veneers Are a Major Investment in NYC You’ve seen the transformations on social media confident smiles that seem to glow from within. Porcelain veneers have become the go to solution for New Yorkers looking to correct chips, gaps, discoloration, or misaligned teeth. But when you start researching “porcelain veneers cost NYC,” the numbers can feel overwhelming, especially in a city known for premium pricing. The truth is that veneers are an investment, and the price includes much more that just the porcelain. From the initial smile design consultation to the skilled lab technicians crafting your custom veneers, every step involves expertise, precision, and artistry. This guide breaks down exactly what you’re paying for, explores affordable options in Brooklyn, and assist you with financing and insurance so you can make an informed decision about your smile makeover. What You’re Actually Paying For: Veneers Price Per Tooth When you see a “price per tooth” quote, it can sound like you’re just buying a thin piece of ceramic. In reality, veneer fees usually include multiple appointments, planning, lab work, and precise placement. The Complete Veneer Process (at a glance): Initial Consultation and Smile Design – Your dentist examines your teeth and discusses your goals. Some clinics show a digital preview of your new smile. Tooth Preparation – A small amount of enamel is gently removed to make room for the veneers. Custom Lab Fabrication – Your veneers are custom-made in a dental lab to match your ideal shade and shape. Temporary Veneers You’ll wear temporary veneers for 2–3 weeks to protect your teeth and preview your smile. Bite Adjustment and Gum Contouring Your dentist checks the fit, bite, and gum line, making small adjustments if needed. Bonding and Final Placement The veneers are permanently bonded and polished for a natural, long-lasting smile. Why NYC Prices Run Higher New York City overhead rent, staffing, malpractice/liability coverage, and dental lab fees tends to be higher than in many other U.S. markets. In addition, cosmetic veneer cases often require more planning time, advanced smile-design skills, and close collaboration with a high-quality lab. You’re not only paying for the porcelain, you’re paying for the expertise and detail work that helps veneers look natural and feel comfortable in your bite. Treatment Planning Smile Makeover NYC: How Many Veneers Do You Actually Need? One of the most common questions patients ask is: “Do I need to veneer all my teeth?” The answer depends on your smile zone the teeth visible when you smile and talk. For most people, this includes: Understanding Your Smile Zone Upper Front 6–8 Teeth: Almost always treated (the most visible teeth) Upper First Premolars: Added if you have a wider smile Lower Front Teeth: Sometimes included if lower teeth Only if they show clearly when you smile Typical Smile Makeover Scenarios Minimal correction (6 veneers): Minor fixes like small gaps or light discoloration Standard smile makeover (8 veneers): Most common option for a balanced, natural smile Full smile design (10+ veneers): Full smile transformation (upper teeth + some lower teeth) The process will be Your Brooklyn cosmetic dentist will photograph your smile from multiple angles and may use digital imaging to determine exactly which teeth need treatment. Some patients only need veneers on 4–6 teeth if they’re primarily correcting a specific concern like spacing or a single dark tooth. Alternatives & Comparisons Porcelain Veneers vs. Other Smile Enhancement Options: Veneers aren’t the only way to improve your smile. Depending on your needs and budget, these alternatives may be suitable: Treatment Option What It Is Best For Limitations Porcelain Veneers Thin porcelain shells bonded to the front of teeth Smile makeovers, discoloration, gaps, shape issues Higher cost; some enamel removal Cosmetic Dental Bonding Tooth-colored resin sculpted directly on the tooth Small chips, minor gaps, single-tooth fixes Stains over time; less durable Whitening + Bonding Teeth whitening followed by bonding for touch-ups Brightening healthy teeth with small imperfections Can’t fix major alignment or damage Dental Crown Full-coverage caps placed over the entire tooth Weak, broken, or heavily restored teeth More tooth reduction; mainly functional Cost-Saving Strategies (Without Compromising Safety) Affordable Veneers Brooklyn: How to Reduce Costs Without Cutting Corners Living in NYC doesn’t mean you have to sacrifice quality for affordability. There are legitimate, safe ways to make porcelain veneers more accessible without compromising your smile or oral health. Strategic Treatment Planning-Focus on the teeth most visible in your smile zone. Many patients achieve dramatic results with 6–8 upper veneers rather than full-mouth treatment. Explore Brooklyn vs. Manhattan Pricing-Brooklyn pricing can be more competitive than some Manhattan practices due to differences in overhead costs such as rent and staffing. Williamsburg practices like Toothology offer sophisticated care without the premium Manhattan markups. Ask About Practice Promotions-Some dental offices offer seasonal discounts, new patient specials, or package pricing for multiple veneers. These offers may not always be advertised, so it’s worth asking during your consultation. Consider Treatment Timing-Scheduling during slower months (typically January–March) may give you more flexibility to negotiate payment plans or take advantage of promotional offers. Verify What’s Included-Always request a detailed treatment estimate that clearly outlines what’s included in the quoted price, such as: Number of appointments Temporary veneers Lab fees Adjustments and
Professional vs. OTC Whitening: Why Your Grocery Store Kit is Failing You
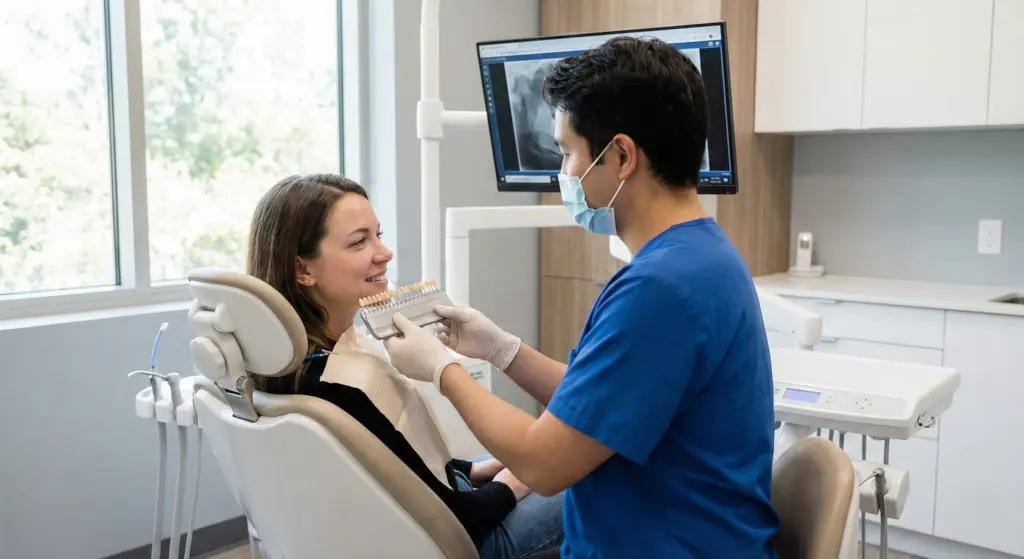
Blog Professional vs. OTC Whitening: Why Your Grocery Store Kit is Failing You Why Professional Whitening Delivers More Predictable and Safer Results Than OTC Kits This article is informed by real-world patient care and commonly asked questions at Toothology in Williamsburg, Brooklyn. Content is written by the Toothology Editorial Team and clinically reviewed byDr. Ayala Lieberman, DDS to support accuracy and safety. Medical references are verified using current clinical standards, evidence-based dentistry, manufacturer guidance for dental materials, and trusted public health resources to help patients make informed oral health decisions Professional teeth whitening vs OTC kits Professional whitening is usually more predictable because it starts with a dental exam, uses stronger whitening gels under supervision, protects your gums, and can include custom-fitted trays for even coverage. Over-the-counter kits can help with mild surface stains, but results often fall short due to poor fit, inconsistent use, lower-strength gels, and lack of guidance especially if you have sensitivity or existing dental work. Professional vs. OTC Whitening: Why Your Grocery Store Kit is Failing You You’ve tried the strips. Maybe the gel trays from the drugstore. You followed the instructions perfectly, dealt with the sensitivity, and waited for that bright white smile you saw in the ads. But when you looked in the mirror after a couple of weeks you weren’t as satisfied with the results as you expected. If you’re wondering why OTC whitening kits don’t deliver what you expected, the main reason is professional whitening and OTC kits are not the same type of treatment. Understanding the difference can save you time, frustration, and unnecessary sensitivity. 7 Common Reasons Your OTC Whitening Kit Isn’t Working (As Expected) 1. One-Size-Fits-All Trays Don’t Actually Fit Anyone The generic trays that come with most OTC kits are designed to fit the “average” mouth. When the tray doesn’t seal correctly against your teeth, the whitening gel can leak onto your gums or pool unevenly. In that case, you might get whitening on your front teeth while your molars stay stained. 2. Lower-strength peroxide means slower results Many OTC products use lower peroxide levels, which can mean milder whitening. Some in-office systems use higher concentrations under supervision for faster, more noticeable results. 3. You’re Treating the Wrong Type of Stain Not all tooth discoloration is the same. OTC kits can help with surface stains (coffee/tea/wine). Deeper discoloration from aging, medication, or trauma often needs professional treatment. 4. Existing dental work won’t whiten Crowns, veneers, and fillings don’t change shade with whitening. That can create a two-toned look if restorations are visible in your smile zone. 5. Sensitivity Stops You Before You See Results Tooth sensitivity is one of the most common reasons people quit OTC whitening halfway through. Sensitivity happens because peroxide can temporarily irritate teeth, especially with recession or enamel wear. Without professional guidance on pacing, desensitizing treatments, or alternative formulations, many people simply give up when the discomfort becomes too much. 6. Inconsistent use leads to inconsistent results Skipping days, shortening wear time, or switching products reduces effectiveness. Professional plans are easier to follow because the schedule is clear and supervised. 7. Hidden dental issues can block results Cavities, gum problems, enamel wear, or cracks can make whitening uncomfortable and unpredictable. A professional guidance can catch these issues before treatment begins, which is why dentists often recommend a cleaning and checkup before any whitening procedure. Whitening Ingredients 101: Hydrogen Peroxide vs. Carbamide Peroxide Both professional and OTC whitening products rely on peroxide-based reactions to break down stain molecules. Understanding the difference between the two main types can help you make sense of product labels. Hydrogen Peroxide Hydrogen peroxide is the faster-acting whitening ingredient. It breaks down quickly when it contacts the teeth, releasing oxygen molecules that penetrate the enamel and break apart stain molecules. Some in-office systems use higher concentrations (often in the 25%–40% range) under professional supervision, but protocols vary by case and product. Carbamide Peroxide Carbamide peroxide is essentially hydrogen peroxide combined with urea, which makes it break down more slowly. It’s often used in take-home whitening trays (both professional and OTC) because the slower release can reduce sensitivity. A 10% carbamide peroxide gel is roughly equivalent to 3.5% hydrogen peroxide in whitening strength. Higher concentrations may work faster, but they can also increase sensitivity and require professional oversight to protect gums Surface Stains vs. Deeper Discoloration: What Whitening Can and Can’t Fix Not all tooth discoloration responds the same way to whitening treatments. Understanding the difference between extrinsic (surface) and intrinsic (internal) stains helps set realistic expectations. Extrinsic Stains (Surface-Level) Extrinsic stains often respond well to both professional cleaning and whitening treatments, including some OTC products if they’re used consistently. Extrinsic stains form on the outer layer of tooth enamel and are typically caused by: Coffee, tea, and red wine Tobacco use Berries and dark-colored foods Poor oral hygiene allowing plaque buildup Intrinsic Stains (Deep Discoloration) These occur within the inner structure of the tooth (the dentin layer) and may be caused by: Aging (as enamel thins and dentin darkens naturally) Certain medications (like tetracycline antibiotics during tooth development) Excessive fluoride exposure in childhood (fluorosis) Dental trauma or root canal treatment Intrinsic discoloration often requires professional-strength whitening, and in some cases, may need alternative cosmetic treatments like veneers or bonding if whitening doesn’t achieve the desired result. What Professional Teeth Whitening Does Differently Comprehensive Exam Before Treatment Every professional whitening plan starts with an examination. Your dentist will check for cavities, gum disease, enamel erosion, and existing dental work. Custom-Fitted Trays for Even Coverage Professional take-home whitening kits include trays made from impressions of your actual teeth. This will ensure the whitening gel stays in contact with all tooth surfaces evenly, prevents leakage onto gums, and delivers consistent results across your entire smile. Higher-Concentration Whitening Gel with Protective Measures In-office whitening uses professional-strength peroxide (often 25-40% hydrogen peroxide) applied under controlled conditions. This allows for better results in as little as one appointment while minimizing risk. Personalized Sensitivity Management If